

Ever wondered how you can make your own beeswax wraps at home – simply & affordably? This is how I do it with just an old sarong scrap, a tiny bit of coconut oil & about 10 grams of grated beeswax on my sandwich press. It takes less than a minute & you can make them any size. They last ages & you can compost them.
To learn more about growing a permaculture garden simply and easily, check out our course The Incredible Edible Garden and learn how to design your own permaculture landscape in our Permaculture Design Course.

Read the Full Transcript
Hi! Welcome again my name is Morag Gamble from Permaculture Life and the Permaculture Education Institute. And every day I’m doing something either in my garden or in my house. About how you can actually get rid of single-use plastics, it’s plastic free July.
So today, I wanted to talk a little bit about how you can get rid of you know the single-use cling wrap, cling film. So there’s a number of different things. So using jars obviously, to store food either on the shelf or in the fridge. You’ve got leftovers, you could simply do the old plate on the top of the bowl method. Which is absolutely fantastic or you can make something like these wax wraps. Now many of you, I know probably either bought these or seen these around. I think they’re absolutely fantastic and I make them myself for a few cents each. Like you can buy these in the stores but it’s probably about thirty dollars for a couple of them. So these actually create a beautiful seal. On whether it be a bowl, or a jar, or you
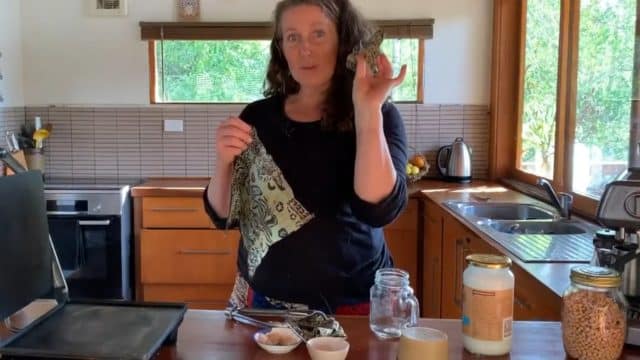
can use them to wrap around sandwiches for lunch boxes which is really great. Because here in Australia anyway we’re on school holidays but tomorrow, or the next day the kids are going to be going back to school again. So these are absolutely fantastic! So what I’ve done is, I’ve just taken an old piece of sarong that’s kind of like a really fantastic type of fabric, a cotton fabric. So this one had a bit of a blowout as you can see I wore it till it’s actually long gone now. So this is what I keep for making things, like beeswax wraps and and polishing clothes and things like that. That’s a really nice thickness and density of the cotton that you want. So it’s simple, all you need is one little bit that you snip out kind of, like a handkerchief size is what I’m going to show you today. But you can make them any size you want really. You can make them a larger size for wrapping up a sandwich, or even bigger again to wrap around a loaf of bread, or cheese whatever size you want you can make it now. Some of the instructions that you might have seen on the internet, have been about using a tray and painting them and putting them and all of that. I came across a different method and particularly, because I’m even in a subtropical environment and I was first exploring these when it was summertime. It was too hot to turn on the oven so I’ve been using a sandwich press.
Now I find this a really easy way, so all you need. And also the thing is that, it actually doesn’t limit the size that you want to use
because I’ll show you. You can actually wrap them up in two little bundles. So all you need is a piece of cotton fabric, nice fine weave, some grated beeswax. So I use probably about 10 grams of wax for something this size. Now you can buy them in blocks like this, from either your farmers market or from a local organic group, or beekeeper. Something like this
cost me about ten dollars. It’s about 300 grams, so I didn’t need 10 grams to make one. So you can see, it’s really very cheap and this is a scrap of fabric. So I’m just going to pop this actually on the hot plate and I’m gonna put my 10 grams of beeswax. I’m not going to use it all, because I may not need to. I can always add some later, and then this is some coconut oil. So you use just about a half quarter of a teaspoon of that, pop it on. They can see, I’m not being very fussy about how I’m doing this, because what I’m gonna do is actually roll it up into a little parcel like that. So as you can see, it doesn’t really matter what size it is. Because you ball it up and as it gets squashed down, it’s just gonna infuse its way through the whole thing. Alright, so I’m just going to turn that on now, the trick is not to preheat your sandwich oven because if you do that it gets too hot really. You only want it for a few seconds, so I’m just gonna just have to wait while it does heat up a little bit. And I’m gonna check it regularly okay, so it’s not quite done yet I’ll just leave that warm up a little bit more. I just keep checking it, maybe turn it over a little bit, it’s getting there. It’s all melting now, it’s starting to go through and you can press it down a bit. Another thing, don’t be worried about actually using your sandwich press for this, because it’s coconut oil and it’s beeswax. And beeswax you know, if you’ve ever eaten the honeycomb, then you’re eating beeswax. Anyway it’s edible, particularly using you know raw organic beeswax. I wouldn’t be using any of the sort of synthetic or non-organic ones. Because they’re not necessarily food. Well you know, this one is all right let’s take a look
at that. Wow! That’s starting to look good, now I’ve got my tongs because the wax gets hot and what I’ll do is, I’ll just wipe it around a little bit. Wipe that off, I always have another one to wipe off the surface and if it gets on your next sandwich. Okay, so now we need to just open that up. Now I’m gonna be careful how I open this up. It is quite hot, actually just turn off the hot plate. I’m just gonna let that dry for a little bit, it doesn’t take long.
A few minutes until it’s nice and starts to get a little bit stiff as it dries, that’s good. It’s a good sign thing is, if you don’t actually put enough on it and it’s not sticking when you trick it. That’s when you crunch it like this, it’s gonna stay as a ball. You know, you’ve got enough then if you haven’t quite got that amount. Then you can always add more. Now, what I like
about these two is that, after you’ve sand you just need to wash them off with some cool water. Or if you’ve got food on it, you can use cool soapy water. If after a few months it feels like they’re not sticky anymore, you can just take them across to sandwich press. Put a little bit more beeswax on, and then keep them going, and going, and going. And if you rinse them off, and then hang them up to dry in a nice Airy spot before you store them back into your shelf again that’s absolutely perfect! All right,
let’s have a look. Let’s see, this one’s good enough, fantastic! So we have another one, so as you see simple and easy and then just to make it stick on your jar. You just use a little bit of pressure from your hands and there we are, that’s it! So that’s how to make your own beeswax wraps at home. Really simply using things that you may, well have just in your kitchen, or scraps of fabric and a sandwich press. Alright, well I’ve put down a few links below. About some of the things, where you can find more information about Permaculture. And I’ll catch you again tomorrow back for another tip about how to get plastic out of your life. Cheers!