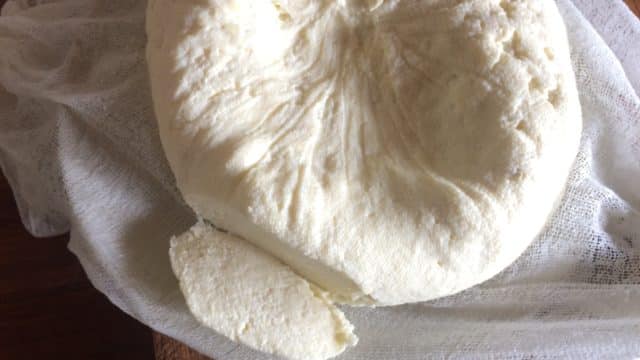
Making cheese is one of those things that just feels so great to do.
The taste is also so amazingly different. Here’s how to make paneer – a very quick and simple cheese to make with just 2 ingredients (fresh milk and freshly plucked lemons) and about 1o-15 minutes of actually making – the rest is just waiting.
Paneer is traditionally made in India. It tastes great on it’s own, in salad, added to curries, in quiches, in spinach cheese bakes, on pizza …so many ways to use it. And of course, there are so many ways to use the whey too!
HOW TO MAKE PANEER
2 ingredients, six easy steps, 10-15 minutes (plus some waiting time for pressing)
STEP 1: GET GOOD MILK

I am so delighted to be part of a caring ethical organic milking collective and our family is involved in milking once a week. That seems to be enough to keep us going with enough milk for drinking, coffees, yoghurt and cheese making. If you are buying milk, choose the best quality organic full cream milk you can find that has not been ultra heat treated (UHT doesn’t work).
STEP 2: HEAT THE MILK

I heated the milk until it was just below boiling. I could see it was just starting to foam around the edge of the pan. The temp was around 200F/93C. I removed the pot from the heat. I had four litres of milk. Without heating the milk you don’t get the curd formation so well.
STEP 3: HARVEST, SQUEEZE & STIR IN THE LEMON (OR LIME) JUICE

While the milk was just starting to boil, I wandered out the garden to get a lemon (and a lime just for something different) and squeezed them in readiness. As soon as the milk was just about boiling I poured in half of the lemon juice. Because lemons are different sizes and juiciness, I always err on the side of caution – you can always add more. You know when you’ve added enough because you can see the milk separate and the curds form.

STEP 4: STRAIN THE CURDS

Line a colander with muslin and have a large bowl underneath to collect the wonderful whey. Wait about 10 mins before straining to ensure the curds have formed well. Then I start by scooping out the large chunks, and gently pour the rest into the muslin.

STEP 5: FORM THE CHEESE

Twist the top of the muslin to contain the curds, then hold it up to drain for a minute giving a bit of a squeeze.

For the next 90 minutes I left a side plate on top to press it into a firm shape while I went to my weekly yoga class. You can press it for a shorter time for a more crumbly texture that is good for sauces.

STEP 6: ENJOY AND STORE

I always look forward to unwrapping the cheese for the first taste – delicious! As you can see this slices quite well and can be chopped into cubes to add to curries.

To store, I put it in a jar in the fridge. Typically paneer used to be made and used in a day, but it is OK to store for a few days in the fridge unsalted. Salted paneer lasts longer.

Using the whey is another wonderful story that I will tell in another post.
HOW TO MAKE PANEER RECAP
The ratio I used here was 4 litres full cream milk (non UHT) to 2 lemons
- Heat milk to just below boiling
- Add lemons gradually till curds form
- Drain through muslin and collect whey
- Press the cheese for 15-90 mins depending on texture desired.
- Store and consume within 3-4 days.
Try different variations – crumbly or hard, different milks, add salt, add herbs.
ENJOY!
I’d love to hear your experiences and variations on making simple homemade cheeses.
Do you want to be a permaculture teacher?
I have just launched the The Permaculture Education Institute and we are now offering our first online Permaculture Design and Teaching course as a combined 10 month program. Sign up before 15 May 2018 for a 50% foundation student discount. More information: http://permacultureeducationinstitute.org


How simple is that! I will definitely give it a go as I’m sure it’s delicious.
Probably silly question but can you use goats milk for this recipe as well.
Sure, that would be fine.